What Size Should Your Custom Patch Be in New Zealand
The best size depends on where you will place it, how much detail is in your design, and how far away people will view it. A patch that looks perfect on paper can feel too small once it sits on a jacket or cap. Use the placement area as your first guide, then adjust for readability, especially when ordering iron on patches nz.
How do you measure the right patch size?
Start with a simple method that avoids guessing.
Steps
Put the item on a flat surface.
Use a ruler or tape to measure the usable space.
Leave extra space around the edges so the patch does not touch seams, zippers, or pockets.
Cut a paper template in the size you are thinking about and place it on the item.
Step back 1 to 2 meters and check if the text and shapes are easy to read.
Tip
If your design has small text, go bigger than you think. Small text is the first thing that fails at small sizes.
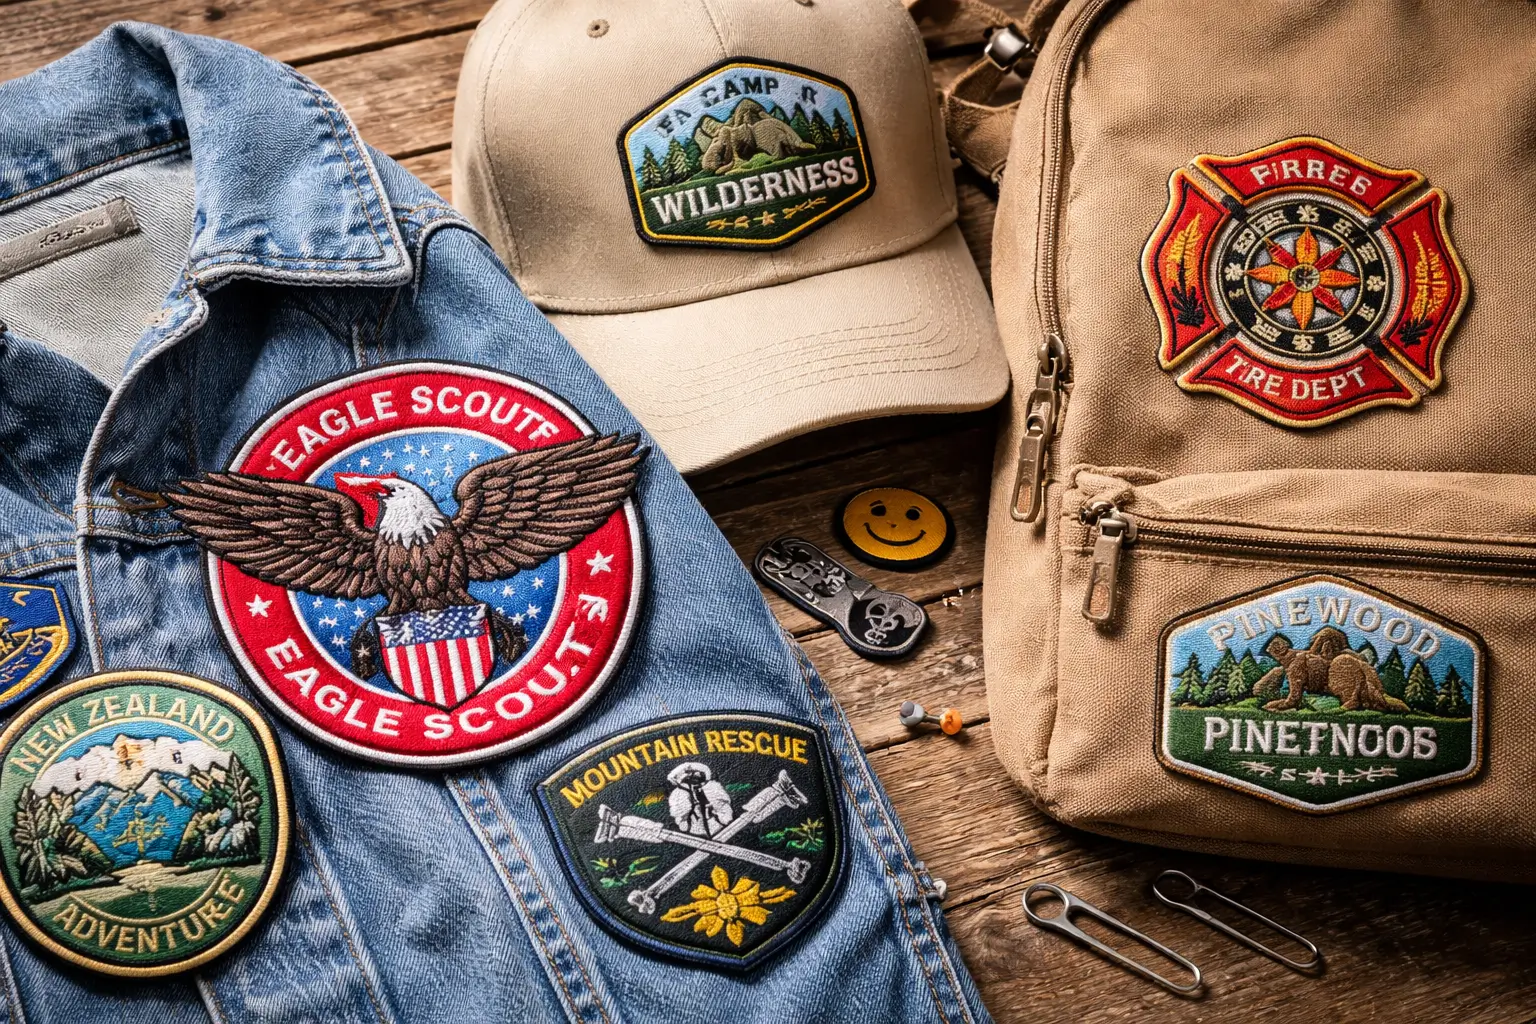
What are common patch sizes by placement?
These ranges work well for most orders in New Zealand. They are not rules, but good starting points.
Hat front patches
Typical sizes
• Width: 2.5 to 3.5 inches
• Height: 1.5 to 2.5 inches
Good for
Simple logos, initials, short team names
Avoid
Long words and thin fonts. Curved hat panels can make tall patches wrinkle.
Sleeve patches
Typical sizes
• Width: 2.5 to 4 inches
• Height: 2.5 to 4.5 inches
Good for
Flags, unit badges, short names, role labels
Tip
Keep sleeves clear of seams near the shoulder and cuff.
Chest patches
Typical sizes
• Width: 3 to 4.5 inches
• Height: 2 to 3.5 inches
Good for
Company logos, name patches, small badges
Tip
Check pocket placement. A patch that overlaps a pocket looks off and lifts over time.
Back patches for jackets
Typical sizes
• Width: 8 to 12 inches
• Height: 8 to 12 inches
Good for
Clubs, large team logos, bold statements
Tip
If your jacket has a center seam, avoid putting fine detail right on that seam.
Bag and backpack patches
Typical sizes
• Width: 2.5 to 5 inches
• Height: 2.5 to 5 inches
Good for
Brand marks, travel patches, team identifiers
Tip
Bags flex a lot. Choose a size that sits on a flatter panel and does not fight zippers.
How does design detail change the best size?
A detailed design needs more space. The smaller you go, the more you must simplify.
Use these quick checks
• Text should be thick and large enough to read at arm’s length
• Thin outlines can vanish on small patches
• Tiny icons may merge into one shape
• Too many colors can look busy at small sizes
If you must keep the patch small, reduce text, use fewer elements, and choose bolder shapes.
Which patch type helps at smaller sizes?
Your patch type can make small designs clearer.
Simple guideline
• Woven patches show small text and fine lines better than embroidery
• Embroidered patches suit bold shapes and simple lettering
• Printed patches suit gradients and detailed art, but care matters for long term color
If your logo has very thin lines, woven or printed is usually the safer pick.
What about shape and border?
Shape changes the usable design area.
Notes that help
• A circle looks smaller than a rectangle at the same width
• A thick border reduces space for the artwork
• A custom shape can fit a logo better, but it may need a little extra size to keep detail clear
If your design is text heavy, a rectangle or shield shape often reads better than a circle.
Conclusion
Pick your patch size by starting with the placement area, then make room for readability. If your design includes text, increase the size or simplify the layout. A paper template test on the actual item is the easiest way to avoid a patch that feels too small once it arrives.
Visit here for informational blogs at https://www.techglobalpost.com/


0 Comments